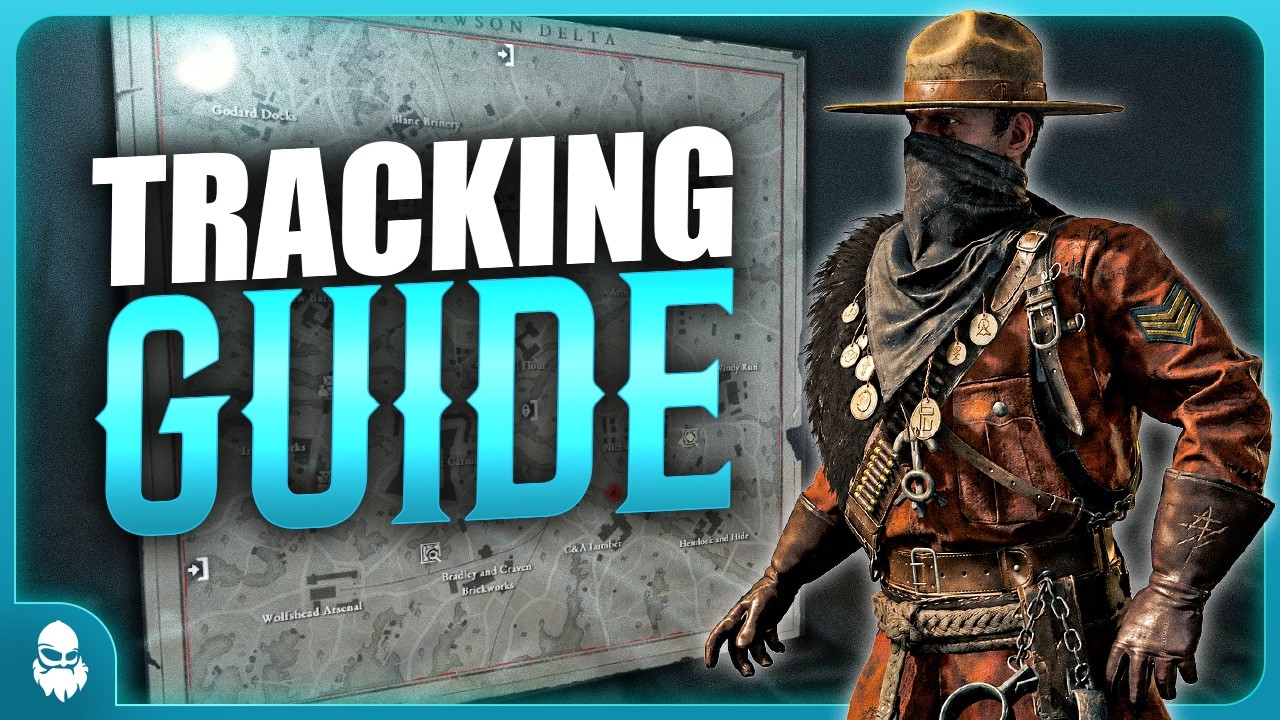
TRACK Like A PRO! The ULTIMATE Tracking Guide For Hunt: Showdown 1896 (2026)
Intro:
Hi guys, REX here!
Have you ever wondered how experienced players always seem to know your exact location?
The answer is information.
Hunt: Showdown is not just a shooter. It’s an information game. Every clue, gunshot, sound trap, dead AI and map update tells you something about what is happening in the match.
The goal of tracking isn’t just to figure out where players were.
It’s predicting where they’re going next.
In this guide, I’ll show you how to gather information, analyze it, and turn it into predictions so you can start reading the match instead of simply reacting to it.
So without further ado, let’s dive into it!
1. Spawn Locations & Early Rotations
Every Hunt match starts with spawn locations, and understanding them gives you information even before you’ve taken the first clue.
Each match can contain up to 12 players, with teams consisting of up to 2 or 3 players depending on whether you’re playing Duos or Trios. Because of this, Duo matches usually contain more teams than Trio matches, which increases the likelihood of nearby spawns and early fights.
Regardless of team sizes, spawn fights are very common. The available spawn points are always the same on each map, meaning you can learn them over time, and this naturally leads to players seeking out the nearest teams to eliminate them quickly.
As you gain experience, you’ll start recognizing common spawn locations and the likely routes teams take from them. Most spawns have one or two directions nearby teams can realistically approach from. Some spawns are very close together and naturally funnel players into each other, while others are further apart with less incentive to move in the same direction.
This allows you to start building theories immediately.
Which spawn locations are near you? If someone spawned there, where are they likely to move first? Can you hold for a moment and listen for movement, gunshots or sound traps to confirm that theory?
You won’t always be correct, but that’s not the point. Tracking is about building likely theories and then updating them as new information appears.
2. Clues, Bosses & Map Greyout
Clues are found across the map and gradually narrow down the search area for bosses in the match. There can be 1 or 2 main bosses, and each has 3 clues tied to it, with the final clue revealing the exact boss location.
Some compounds can also contain two clues instead of one, and these often become PvP hotspots because they provide faster information and attract teams looking for early fights. Healing Waters Church, Blanchett Graves & Port Reeker are examples of such compounds.
If there are 2 bosses, you can identify which search area belongs to which boss by opening the map. One boss icon will have a solid line beneath it, while the other uses a stapled line, allowing you to tell them apart.
When you interact with a clue, the seal breaks, leaving a dark circle in the middle and letting other players know it has already been taken. At the same time, portions of the map become greyed out, narrowing down the possible boss locations. Since the greyout happens in the same sequence for all teams, it can also be used to predict player movement. If you hear sound traps being triggered outside the active zone, for example, you can often assume that team will eventually need to move back into the remaining search area to collect their next boss clue.
The Pathfinder Tarot Card takes this a step further by revealing all previously collected clues on the map, giving you valuable information about where teams have already been and which areas may still be uncontested.
Clues are also an important source of immediate information. Until you’ve collected a clue, it will turn orange and begin screaming if an enemy team is within 30 meters. This is especially relevant early in the match, where a red clue often confirms that you’re about to have a spawn fight. Just keep in mind that once the clue is taken it will no longer be screaming for you if enemy teams are near, while they still get that notification. But on the plus side, without the clue screaming in your ears you’ll also hear better, and for that reason taking the clue when a fight starts can often be a good idea if you want less audio clutter when fighting another team.
Boss lairs have a similar warning system. When entering Dark Sight near a boss compound, the boss icon will glow white if no enemy hunters are nearby, and red if enemy hunters are within 50 meters of the lair. This warning indicator disappears as soon as the boss is dead.
3. Audio Tracking
Hunt: Showdown is packed with sound traps, all designed to give away your position if you’re not paying attention. This includes ducks, crows, horses, dog pens, chicken coops, bats and cows. Each has distinct audio cues, leaves evidence behind when dealt with, and behaves in different ways.
For example, crows and ducks leave feathers when flying away and travel away from the source that triggered them. Horses and cows remain dead on the ground when killed, while burnt dog pens and chicken coops leave charred corpses behind. This means you can track players not only through the sounds they make, but also through the evidence they leave behind afterwards.
Audio tracking extends beyond sound traps. Since sound travels far in Hunt, you can often hear footsteps, hunters performing melee attacks, or AI reacting to nearby players. Aggroed Hives, Armoreds and Meatheads all produce distinctive sounds that can reveal player activity from a surprising distance.
Then there’s combat audio. Gunshots can often be heard across large portions of the map, and every weapon has a unique sound signature. While you won’t recognize every weapon immediately, you’ll eventually learn to identify many of them by ear. With experience, you’ll also start estimating distances based on how sounds travel through the environment, helping you determine whether a fight is happening nearby or several compounds away.
This gives you valuable information before a fight even starts. For example, hearing an Avtomat nearby may encourage a more cautious approach.
Weapon sounds can also help you track players over time. If you later discover a dead hunter carrying an Avtomat, there’s a good chance you’ve found the same player you heard earlier. That tells you not only who was involved in the fight, but also that another team killed them which now need to be accounted for.
And finally, don’t overlook explosives and utility items. Explosions are loud, often highly visible and easy to track. Choke bombs leave clouds behind for a couple of minutes, poison clouds last even longer, and flare guns produce both a distinctive sound and a highly visible flare that remain on the ground for a while.
The main takeaway is simple: almost everything in Hunt makes noise, and almost every noise tells a story if you know how to interpret it.
4. Physical Tracking
Almost every interactable in Hunt leaves a visible trace after being used. Envelopes, ammo crates and Hunt Dollar purses remain open. Doors remain partially open after interaction, letting you know someone passed through. Many sound traps also leave visible evidence behind after being triggered or destroyed, providing another way to track players even after the audio itself is gone. Most fences break the first time a player vaults over them, destroyed barrels leave broken remains behind, and used medkits leave bloody rags on the ground. Even trait spurs leave scorch marks after disappearing, letting you know someone claimed them earlier in the match. And since trait spurs last for 90 seconds after they are claimed, seeing one disappearing in front of you provides valuable information as well, because it means someone was there very recently.
AI can provide valuable information too. Dead Meatheads and Brutes remain on the ground for the entire match. Because they always drop a trait when killed, there will either be a trait spur available to collect or a scorch mark showing that someone already claimed it.
The amount of remaining AI in an area can also tell you a lot. If a compound is full of AI, chances are nobody has passed through recently. If only a few remain, another team may have already been there. And if the area is almost completely clear, there’s a good chance players recently passed through and dealt with most of the AI.
Then there’s projectile tracking. Arrows, bolts and throwables remain in the world until picked up, and because they can be seen in Dark Sight, they often provide clear evidence that another player passed through the area. The type of projectile can also tell you which weapons you’re likely to encounter later. Arrows suggest a bow user, while bolts indicate someone is running a crossbow. If you later find those players dead, you can often connect the evidence together. Projectiles can even reveal the direction they were fired from if you carefully examine the angle of the shaft, allowing you to narrow down where an arrow or bolt came from.
Finally, dead hunters provide some of the most valuable information in the game. Every corpse tells a story about what happened before you arrived. Since there can be up to 12 players in a match, finding three dead hunters may indicate that an entire team has already been eliminated, helping you estimate how many players are still alive.
Bodies can also help identify where shots came from, because hunters tend to fall with their feet pointing towards whatever killed them. While this isn’t perfectly reliable, it can often help narrow down the direction of remaining players, especially if the fight happened recently.
Just like audio tracking, physical tracking is all about building a picture of what happened before you got there. The more pieces of evidence you find, the more confident you can be in your conclusions.
5. Banishment & Bounty Pickups
Whenever a boss is banished, it is announced to every player in the match and its location becomes visible to everyone. The timing and location of a banish can tell you a lot about what is happening across the map.
For example, if a boss is banished almost immediately after the match starts, that’s a strong indication that a team spawned nearby and reached the boss uncontested. You now know where the boss is, where at least one team is located, and that many other teams will likely start moving in that direction unless another bounty is competing for their attention.
On the other hand, if no boss is banished well into the match, there’s a good chance players have been occupied fighting each other instead. As more time passes, the likelihood of encountering another team near the boss increases, along with the risk of being ambushed while fighting it. At the same time, the number of remaining players in the match is likely decreasing.
Once a boss is banished, the banishment progress is visible on the boss icon until the bounty becomes available for pickup. If a banishment has only just started, players are almost certainly still nearby. However, as time passes, there is always a chance they have repositioned or rotated towards a second bounty or wild target.
When the bounty becomes available, teams will usually pick it up immediately. Since regular bosses drop two bounty tokens, the pickup timing can help you estimate team size. If both tokens are picked up instantly, you already know there are at least two players present. In Trio matches, there’s a good chance a third teammate is nearby as well. If only one token is collected, there’s a good chance you’re dealing with a solo player. Wild targets are an exception to this rule, since they only provide a single token.
Delayed bounty pickups can reveal even more information. The team that killed the boss may have left the lair to chase another objective, fight nearby players, or secure a second bounty before returning. They may have trapped the area in case someone tries to grab the tokens, or they could be intentionally leaving the token behind to make the compound appear abandoned, whilst actively camping entry points. In some cases, a solo player may simply choose not to pick up the token immediately to avoid revealing their position on the map.
Because of this, a bounty token sitting unclaimed should never automatically be considered free. Treat it as information, not a guarantee of safety.
6. Dark Sight Boost, Instinct & Scorch Marks
Dark Sight Boost is one of the most powerful information tools in Hunt: Showdown, but it comes with a major downside. While carrying a bounty token, your location is visible to every player on the map.
To compensate for this, bounty carriers gain Dark Sight Boost, allowing them to see enemy hunters up to 150 meters away while they have remaining boost. By default, picking up a bounty grants 5 seconds of boost, while solo players with Magpie receive 10.
Bounty carriers also gain access to Instinct. When using Dark Sight, Instinct causes the edges of the screen to glow orange whenever enemy hunters are within 75 meters. This allows you to quickly determine whether players are nearby, especially in situations where you don’t expect players and don’t want to waste your valuable dark sight boost.
Instinct also acts as a counterbalance to being permanently visible on the map. Even after your Dark Sight Boost seconds are gone, Instinct continues to warn you about nearby hunters, helping protect against ambushes, campers and other players trying to catch you off guard.
However, Dark Sight Boost can also be gained through other sources, including Dark Sight envelopes, Fortune Teller machines and Moon Tarot Cards, as well as by taking clues or looting dead hunters while carrying a bounty token.
Whenever a player gains Dark Sight Boost from any source, a scorch mark is created on the map at their current location. These marks are visible to all players and slowly fade over five minutes. By paying attention to when and where they appear, you can often determine both player positions and movement patterns.
A scorch mark that appears immediately after the match starts usually indicates someone used a Moon Tarot Card, which also means they most likely brought it in and will likely be scanning for nearby players in case of a spawn fight. A scorch mark appearing later along a road or inside a compound is more likely to come from a Dark Sight envelope or a Fortune Teller machine.
Bounty pickups create marks as well. These marks can reveal a surprising amount of information. They show where players have been, where bounty carriers are replenishing their boost, and sometimes even where teams were eliminated. For example, several marks clustered together often suggest that multiple hunters were looted in the same location.
Like many tracking tools in Hunt, a single scorch mark rarely tells the whole story. Combined with other information sources, however, they can help paint a remarkably accurate picture of what’s happening across the map.
7. Extractions & Chariot Cards
Each match has 4 extraction points available, with 2 being open and 2 being locked at any given time. One of these extractions is always located in the center of the map and starts locked by default. Extractions and supply points are hidden at the start of the match, but can be revealed either by discovering them manually or by interacting with Scout Maps found at key locations.
Since only two extractions are open at a time, players often have a limited number of realistic escape routes. This naturally influences movement across the map, especially once bounty teams begin planning their extraction.
This is where the Chariot Tarot Card comes into play. Chariot swaps all open and locked extraction points and has a cooldown of five minutes. Depending on who is holding it, this card can either be your best friend or your worst nightmare.
As a general rule, you should assume that somebody either brought a Chariot Card into the match or found one during the game. If you’re carrying a bounty and heading towards an open extraction, there is always a chance that someone will activate Chariot as soon as you arrive at the extraction point.
This can force you to completely change your route and often creates opportunities for ambushes, as other teams usually have enough time to reposition between you and the nearest newly opened extraction.
Because of this, the closest extraction is not always the safest one. In some situations, it may be worth taking a slightly longer route if it leaves you with a nearby locked extraction as a backup option.
On the other hand, if you have a Chariot Card available yourself, heading towards a locked extraction and activating the card to open it can be an excellent way to avoid being forced into a dangerous rotation.
Chariot can also be used offensively. If you’re tracking a bounty team and know which extraction they’re heading towards, you can activate the card to force them onto a different route and potentially set up an ambush along the way.
Like many systems in Hunt, extraction planning is ultimately about prediction. Understanding which routes players are likely to take—and how Chariot can suddenly change those routes—gives you another powerful tool for anticipating player movement.
8. Information Traits
There are several traits that provide valuable information if used correctly. I’ve covered every trait in the game in great detail in my Ultimate Trait Guide & Tier List, so I’ll keep this section brief and focused on the ones most relevant to tracking.
The most important tracking trait in the game is Witness. This trait allows you to see recently killed AI in Dark Sight as white lines that gradually shrink over time until they disappear. Meatheads and Brutes are exceptions, as their lines remain for the duration of the match.
A single line doesn’t necessarily tell you much, since AI can die to other sources like fire, but multiple lines clustered together is strong evidence of another team recently passing through the area.
Downed hunters also show up with a white line in witness, marked with an orange dot at the bottom. These remain visible for as long as the body is on the ground and can be used to track dead players, monitor revives, locate bodies for looting, and estimate how many players remain in the match. If three bodies are lying close together, there’s a good chance an entire trio was wiped out, meaning there can be no more than nine players remaining, including yourself and your teammates. If a single secluded line suddenly disappears, you may be dealing with a self-reviving solo, or someone simply revived their dead teammate.
Another incredibly powerful tracking trait is Blast Sense. This trait reveals gunshots and explosions in Dark Sight up to 150 meters away. Because it shows the exact location of these events, it can be incredibly useful for identifying where fights are taking place, tracking player movement, and estimating how many teams are involved.
While Witness and Blast Sense are the most impactful tracking traits, there are a few others worth mentioning.
Vigilant allows you to see traps in Dark Sight. Not only does this help you avoid them, but it also tells you something about the players you’re dealing with. If they’ve trapped one area, there’s a good chance they’ve trapped others as well.
Beastface reduces the chance of triggering sound traps, making players harder to track through audio. And similarly, the Shadow trait prevents AI from aggroing onto players, allowing them to move through compounds freely. Because of this, a compound full of AI doesn’t always mean nobody has been there.
Like every other tracking tool in Hunt, traits are most powerful when combined with other information sources. The more pieces of evidence point towards the same conclusion, the more confident you can be in your prediction.
9. The Bigger Picture
At this point, we’ve covered a lot of different information sources.
The important thing to understand is that none of these information sources are particularly powerful on their own.
Tracking isn’t about finding a clue and magically knowing where everyone is.
It’s about combining multiple pieces of information to build a theory of what’s happening in the match.
For example, let’s say you hear gunshots two compounds away shortly after the match begins. A minute later, the shooting stops and a banishment starts in the same location.
What does that tell us?
Most likely, a team either spawned at the boss or discovered it very early. The gunfire suggests they killed the boss quickly using loud weapons, and the banishment confirms they’re still there.
Now ask yourself what the other teams are likely to do.
Some teams will continue gathering clues if there is a second boss. Others will rotate directly towards the banishment. If there’s only one bounty on the map, chances are a large portion of the server will eventually move towards that location.
Let’s look at another example.
You enter a compound and notice several dead AI, a broken fence, an open ammo box and a few arrows scattered around.
Individually, none of these things tell you very much.
Together, however, they paint a much clearer picture. Someone was here recently. They’re using a bow. They moved through the compound in a specific direction. And if you continue finding similar evidence in nearby compounds, you can begin following their rotation across the map and predict where they are heading.
The same applies to ongoing fights.
When you hear a fight, try to identify how many players are involved. Listen for different weapons, death sounds and revives. Use Witness and Blast Sense if you have them available. The more accurately you can identify who is fighting whom, the easier it becomes to decide whether you should push, wait, rotate or avoid the fight entirely.
Experienced players are constantly building and updating theories about what’s happening around them. Every piece of information either strengthens or weakens those theories and helps narrow down the most likely outcome.
And that’s ultimately what tracking is.
Not certainty.
Prediction.
The more information you gather, and the more experienced you become, the more accurate those predictions will be.
10. Common Tracking Mistakes
One of the biggest mistakes players make is overanalyzing individual pieces of evidence.
Just because you found a dead horse, heard a sound trap in the distance or saw a broken fence doesn’t mean you know exactly where another team is. Tracking becomes much more reliable when multiple pieces of information point towards the same conclusion.
Another common mistake is ignoring map information. Many players focus entirely on what is happening directly around them and forget to consider clues, greyouts, banishments, bounty movement and extraction locations. Some of the most valuable information in Hunt comes from simply opening the map and thinking about what other players are likely doing or planning to do next.
It’s also important to avoid chasing outdated tracks. Just because a team was somewhere two minutes ago doesn’t mean they’re still there. Always consider how much time has passed and where they could have moved since then.
It’s also important to avoid tunnel vision. One of the most common beginner mistakes is hearing a few gunshots and immediately start charging in that direction, only to find nobody is there when you finally arrive. This is one of the biggest reasons newer players often feel like they can’t find anybody in their matches.
The best trackers don’t follow every gunshot. They follow the flow of information.
Many players also assume everyone plays optimally. In reality, players make mistakes, take unusual routes and sometimes do things that make no sense at all. If your theory requires the enemy to make the perfect decision every time, there’s a good chance it’s wrong.
Remember, tracking isn’t about finding certainty. It’s about identifying the most likely explanation based on the evidence available.
11. Key Takeaways
If there’s one thing I want you to remember from this guide, it’s that tracking isn’t about certainty. It’s about prediction.
You don’t need to know exactly where another team is. You simply need to identify where they are most likely to be.
The best trackers don’t rely on a single clue. They combine multiple pieces of information and look for patterns that point towards the same conclusion.
As you keep improving, try asking yourself three simple questions:
Where are the teams?
What are they doing?
And where are they likely going next?
The more often you ask those questions, the more naturally you’ll start developing game sense, map awareness and predictive tracking.
And over time, you’ll begin noticing things that most players never even think about.
Outro:
And that’s it for this Tracking Guide.
Hopefully this gives you a better understanding of how experienced players gather information, predict enemy movement and read what’s happening around the map.
If you learned something new, don’t forget to leave a like, subscribe and let me know in the comments what tracking methods you use the most. And if there’s a topic you’d like me to cover next, feel free to leave a suggestion as well.
Thank you for watching, and I’ll see you in the next one!