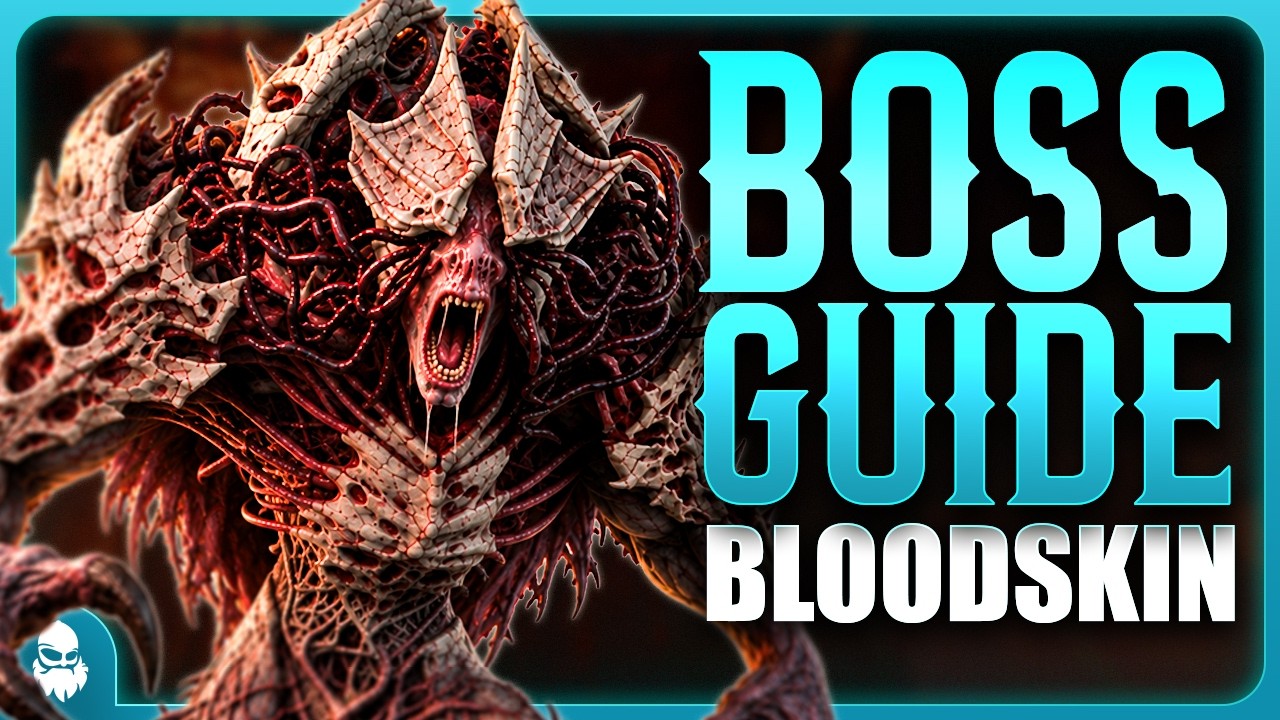
The ULTIMATE Bloodskin Boss Guide – Everything You Need To Know (2026)
Bloodskin has arrived in Hunt: Showdown, bringing with it one of the most unique boss fights we’ve seen so far.
Unlike the other bosses in the game, Bloodskin has two completely different phases. You first face a slow, heavily armored monster where breaking its armor and exposing weakspots is key, before it transforms into a fast and aggressive creature that teleports around the lair and attacks from all directions.
But once you understand how the armor works, which damage types Bloodskin is weak to, and what to expect from each phase, there are some incredibly effective ways to take it down.
So in this guide, I’ll break down the entire fight, including Bloodskin’s attacks, strengths and weaknesses, how both phases work, and some of the best weapons and strategies I’ve found for killing it quickly.
But without further ado, let’s dive into it!
1. FINDING BLOODSKIN
Bloodskin is the fifth main boss to be added to Hunt: Showdown, released with Update 2.9 and the Blood Testament event in September of 2026.
Just like the other four main bosses, Bloodskin can be located by collecting regular boss clues and narrowing down the search area until you find its lair.
Alternatively, you can use the World Tarot Card to immediately reveal Bloodskin’s location.
2. PHASE 1: THE ARMORED STAGE
In the initial phase, Bloodskin is a heavily armored and relatively slow tank.
Upon entering the lair, Bloodskin moves toward the player, and when close enough, it stops for a brief moment and lets out a loud roar. From there, Bloodskin will continue chasing you throughout the fight, but because of its relatively slow movement speed, it can easily be kited around the compound.
2.1 ARMOR & WEAKSPOTS
There are five armor plates in total: one on each arm, one on the chest, one on the spine, and one on the head. Each plate can be individually broken, revealing a fleshy weakspot underneath.
While the armor is intact, it heavily reduces incoming damage, even against effective damage types. However, once a weakspot is revealed, you can specifically target it to deal significantly higher damage.
Every time you break an armor plate, Bloodskin is staggered, slowing it down for a brief moment.
It is not necessary to destroy all five armor plates. You can, for example, destroy the chest plate and continue attacking the exposed weakspot to bring Bloodskin into Phase 2. However, damaging the central weakspots or the head seems to be particularly effective.
The armor plates also deflect projectiles that would normally stick, such as Sticky Bombs, Throwing Spears, axes and knives.
However, it is possible to break open a weakspot and perfectly land a Sticky Bomb inside the exposed area to make it stick.
There is also one exception to the rule: Bomb Lance projectiles stick to Bloodskin even when they hit the armor, making this weapon highly effective overall.
One important thing to keep in mind is that any explosives stuck to Bloodskin will fall off when it teleports during Phase 2.
2.2 ATTACKS
Bloodskin’s main attack during Phase 1 is a heavy swing that deals around 50 blunt damage. It can sometimes follow this up with a second swing.
These melee swings do not go through surfaces, meaning you can avoid them by taking cover behind objects around the lair, or simply by moving out of the way and keeping some distance.
Bloodskin can also perform a leap to quickly close the distance. If this hits you, it deals roughly 80 damage and knocks you to the ground.
2.3 STRENGTHS AND WEAKNESSES IN PHASE 1
During Phase 1, Bloodskin is resistant to poison damage, including poison clouds and poison ammunition, as well as blunt damage from weapons such as the Hammer or Baseball Bat.
Its main weaknesses are piercing and fire damage.
Piercing damage includes arrows, bolts, the Throwing Spear, and essentially anything pointy.
Fire damage includes fire pools from lanterns, Dragon Bolts from the Hand Crossbow, incendiary ammo, and the Flame Rifle.
However, because of how resistant the armor itself is, revealing one or more weakspots is necessary to deal meaningful damage.
Once Bloodskin’s first health bar is depleted, Phase 2 begins.
3. PHASE 2: THE AGILE STAGE
When Phase 2 starts, Bloodskin sheds its armor and transforms into an entirely new state, which is also indicated by the boss icon changing.
This new creature is far more agile and deadly, and comes with entirely new attack patterns as well as a new weakness.
One important mechanic is that any overkill damage from Phase 1 carries over into Phase 2. This means that if you deal particularly heavy damage with the attack that empties the first health bar, the excess damage is applied directly to Bloodskin’s second health bar.
This can be extremely powerful with certain weapons, as we’ll cover later.
3.1 BLOOD WELLS & TELEPORTATION
As Phase 2 begins, Blood Wells erupt and become active throughout the boss lair. These now serve as teleport fountains for Bloodskin.
Bloodskin will frequently teleport between these wells to close the distance or gain new sightlines on players. This means it can be in front of you one moment and behind you the next, requiring you to constantly keep track of its movement.
3.2 ATTACKS
One important distinction between Phase 1 and Phase 2 is that Bloodskin now inflicts bleeding with its attacks instead of dealing purely blunt damage like in Phase 1.
After teleporting, Bloodskin can perform one of three attacks.
It can throw a Blood Bolt, dealing around 30 damage and inflicting bleeding. This typically happens when it teleports to a Blood Well some distance away from you.
If Bloodskin teleports close to you, it can instead rush in for a melee swing, dealing about 45 damage and causing bleeding.
Finally, it can lash out with a tentacle, dealing around 20 damage. If this connects, Bloodskin pulls itself toward the player and immediately follows up with a melee swing dealing around 50 damage and inflicting bleeding.
All of these attacks can be dodged if you pay attention to Bloodskin’s movements.
Which attack Bloodskin chooses initially appears somewhat random, although after extensive testing, I believe distance may actually determine the attack.
My current theory is that Bloodskin will throw a Blood Bolt at long range, perform a melee rush at close range, and use the tentacle at mid-range, where the distance is too far for the melee rush but too close for a Blood Bolt. I haven’t been able to confirm this yet, but based on my testing, it seems highly plausible.
3.3 STRENGTHS & WEAKNESSES IN PHASE 2
Like in Phase 1, Bloodskin remains heavily resistant to poison and blunt damage, while piercing and fire remain effective.
However, it now gains an additional weakness: rending damage.
This means sharp swinging attacks from weapons such as the Axe, Katana, and Bomb Lance become particularly effective.
If you’re uncertain about the distinction, a Katana stab deals piercing damage and is effective during both phases, while a slash using the Martialist Trait deals rending damage and becomes more effective during Phase 2.
Bloodskin also seems to be generally more resistant to damage during Phase 2 compared to hitting exposed weakspots during Phase 1, although effective damage types still deal incredible damage.
4. THE SIPHON TRAIT
When killed, Bloodskin drops the Siphon Trait.
This trait was introduced with Update 2.9 and allows players to loot a Scarce Trait from a dead Hunter, transferring Siphon to them in its place.
As of Update 2.9, Siphon prioritizes Death Cheat whenever possible. However, a player who has Death Cheat stolen does not lose their Hunter if they die during that Mission.
Secondly, Siphon prioritizes Necromancer when looting a Hunter who is playing as part of a team. And finally, Solo players cannot have Necromancer stolen.
Beyond that, Siphon steals a random Scarce Trait when possible, and remains on your Hunter if no traits can be stolen.
5. BANISHING BLOODSKIN
Upon death, Bloodskin remains on the ground to be banished, just like every other main boss. Once the banish is complete, it drops two Bounty Tokens as usual.
There is one important difference, however.
Once Bloodskin is banished, nearby AI becomes frenzied, increasing their attack speed and awareness, indicated by a dark, smoky aura. This is the same effect introduced with Update 2.9’s Intense Blood Moon.
The frenzied effect remains active for the entire banish and ends once the banish is complete.
6. BEST WEAPONS & STRATEGIES
In preparation for making this guide, I tried a wide range of weapons and strategies to figure out and narrow down what actually works well against Bloodskin.
The most important thing to understand is that once you figure out how to effectively break the armor and target the exposed weakspots, most weapons can work quite well.
But there are definitely some standouts.
6.1 PIERCING & RENDING WEAPONS
The Hunting Bow makes easy work of Bloodskin, quickly chipping away at the armor plates while allowing you to precisely target exposed weakspots for heavy damage.
The Katana similarly deals very high damage to Bloodskin and can become absurdly effective if you also have the Berserker Trait to double your melee damage.
The Shredder, while it doesn’t deal piercing damage, still makes easy work of Bloodskin throughout the fight because of its extremely high base damage. This was one of the most effective weapons I found for killing Bloodskin.
6.2 FIRE DAMAGE
Fire remains one of the best ways to deal with Bloodskin once weakspots are revealed and becomes even easier to use once the armor is completely shed in Phase 2.
Incendiary ammo deals heavy damage when targeted at exposed weakspots while also setting the boss on fire.
Dragon Bolts ignite the boss and deal a solid chunk of damage over time.
And the Flame Rifle, while somewhat difficult to land accurately during Phase 1, absolutely melts Bloodskin if you can consistently hit the exposed areas.
It becomes far easier to use effectively during Phase 2 once the armor is gone and makes very quick work of the boss.
6.3 DEFAULT AMMO & SHOTGUNS
Regular ammo and shotguns remain effective throughout the entire boss fight.
Shotguns initially deal very little damage against the armor itself, but they can break armor quickly. Once you target an exposed weakspot, they deal very heavy damage.
Likewise, Shotbolts on the Crossbow deal extremely high damage, as they effectively produce a buckshot blast on impact.
Regular bullets are very reliable as well, allowing you to steadily chip away at the armor before dealing massive damage by targeting the exposed weakspots.
Once the armor is gone, it simply becomes a matter of chipping away at the boss’s remaining health while avoiding its attacks.
6.4 THE NITRO EXPRESS
The Nitro Express is the absolute winner when it comes to dealing with Bloodskin.
With regular ammo, the first shot can break open an armor plate and deal a solid chunk of damage.
A second shot targeted directly at the exposed weakspot can then kill Bloodskin entirely.
Because overkill damage from the first health bar carries into the second, this results in an almost instant boss kill.
6.5 EXPLOSIVES
Explosives are highly effective against Bloodskin, as they are against most bosses.
A Big Dynamite Bundle can kill the boss instantly if detonated perfectly, while still dealing massive damage if it lands close to Bloodskin.
Dark Dynamite Satchels can also be used and deal the same damage as a Big Dynamite Bundle.
Explosive ammunition is highly effective as well, for example when using the Mako or Uppercut.
6.6 TOOLS & CONSUMABLES
The Throwing Spear is highly effective for breaking open armor and precisely targeting weakspots during Phase 1, while dealing solid damage overall, as it does against most bosses.
The Pennyshot Derringer similarly deals solid damage and is particularly effective at breaking open armor plates and damaging the boss.
And finally, the Tower Tarot Card works against Bloodskin just like it does against the other main bosses, instantly removing three-quarters of the boss’s total health, which brings Bloodskin well into Phase 2 and leaves it extremely easy to finish off.
OUTRO
And that rounds off this Bloodskin guide!
If you found the guide helpful, don’t forget to like and subscribe so you don’t miss upcoming videos!
Obviously, at the time of posting this guide, the boss is still quite new, and few of us are likely to know every single detail.
If I got anything wrong, or if you’ve discovered additional mechanics beyond what I’ve covered here, I’d love to hear about them in the comments.
Likewise, if you’ve tested any next-level strategies or combinations against Bloodskin, feel free to share your results as well!
Thank you so much for watching, and until next time — I’ll see you in the Bayou!