20 ARC Raiders Tips I Wish I Knew Sooner…
Hi guys, Rex here!
Today I’m sharing 20 ARC Raiders tips I genuinely wish I knew sooner. The game doesn’t explain most of this stuff, and learning it earlier would’ve saved me a lot of time — and a lot of deaths.
So without further ado – let’s dive into it!
1. Zipline direction is fully controllable
Most players don’t realize this, but you’re not locked to the direction you’re moving once you attach to a zipline. If you jump off, turn your camera, and immediately reattach, you’ll start moving in the opposite direction.
In general, zipline movement is based on where you’re looking when you attach — up for upward, down for downward, and toward whichever end you want to travel. Learning the difference will allow you to move far more effectively and get from A to B quicker.
2. Grabbing a ledge prevents fall damage
If you ever fall off a high place, don’t panic — if you grab onto any ledge on the way down, you’ll avoid taking fall damage.
This also works when attaching to ziplines from big drops. Just make sure you don’t attach too late or the slowdown animation won’t catch you.
3. Rolling reduces fall damage
When you can’t reach a ledge, timing a roll as you hit the ground reduces the damage you take and helps you keep moving without wasting healing items. Starting the roll before you drop off a ledge has the same effect as well. Just keep in mind, this only works up to a certain height, so don’t go dropping off any 10-story buildings.
4. ARC won’t spot you through foliage
If you hide in dense foliage, ARC units have a very hard time spotting or locking onto you. It’s an easy way to slip past patrols or avoid unnecessary fighting which could potentially give away your position to other players.
5. Smoke grenades will save your life
Smokes are way more useful than people think. If you’re stuck in the open, need to cross dangerous ground, or want to avoid getting locked onto by nearby ARC, smokes solve all of that.
I also use them proactively at extraction to make myself harder to see when activating the panel, which has drastically increased my survival rate.
6. Blaze grenades melt Leapers
Leapers can be annoying to deal with, but Blaze grenades absolutely destroy them. One or two grenades will remove most of their health, after which they’re easy to finish with something like a Ferro or Anvil. Super useful to know if you’re working on a trial or trying to acquire leaper parts for upgrades.
7. Jolt mines don’t trigger on you
If you place a Jolt Mine, it won’t activate when you walk over it but will trigger if an enemy steps into its zone.
This lets you create safe escape routes, bait players into traps, or hold choke points without risking getting hit by it.
8. Synthesized Fuel is a makeshift bomb
Synthesized Fuel isn’t just a crafting item. If you throw it and shoot it, it explodes — and it hits surprisingly hard. It can be great for damaging ARC or players alike, depending on the situation, or even be used to force players out of cover!
9. Melee is stronger than you think
After damaging another player, swapping to melee is often better than trying to reload. Three hits will down a full-health raider, and as a finisher it’s extremely reliable. Just don’t overcommit to melee from the start, as I’ve learnt the hard way that rarely works in most cases.
10. ARC Power Cells act as backup shield rechargers
Whenever you kill ARC, they drop Power Cells — and you can consume these directly to recharge your shield when you’re out of shield rechargers. It’s a clutch way to stay in the fight longer, and something I believe most beginners are not aware of!
11. In-round crafting
The Survival Skill Tree lets you unlock the ability to craft items during a raid, starting with basics like bandages and shield rechargers. This can be a complete lifesaver, and is amazing for sustainability, allowing you to stay longer in your raids.
If you upgrade it further down the skill tree, you can even craft things like hatch keys mid-raid, giving you more options for safer extractions when you really need it.
12. Fabric works as an emergency heal
Everyone knows how bandages work, but a lot of players don’t realize you can actually heal with fabric. Fabric is everywhere, and you can also get it by recycling a bunch of different items you find in a raid. That means you’ll almost always have some available as a backup heal, even if you’re out of bandages or haven’t unlocked in-raid crafting yet.
13. Your Refiner can craft key components
Something that took me way too long to realize is that the refiner can craft higher tier components.
You can make Advanced Electronic Components for hatch keys, Mechanical Components for weapon upgrades, and more — which drastically improves your options for crafting things you need.
14. You can buy mark 2 augments at the clinic
For 6,000 coins, the clinic sells one of each mark 2 augment per reset timer, and they’re extremely good value.
For example, the Looting MK2 gives you three augmented slots for valuables and two safe slots, which are great for questing and farming without risking items you really want to keep.
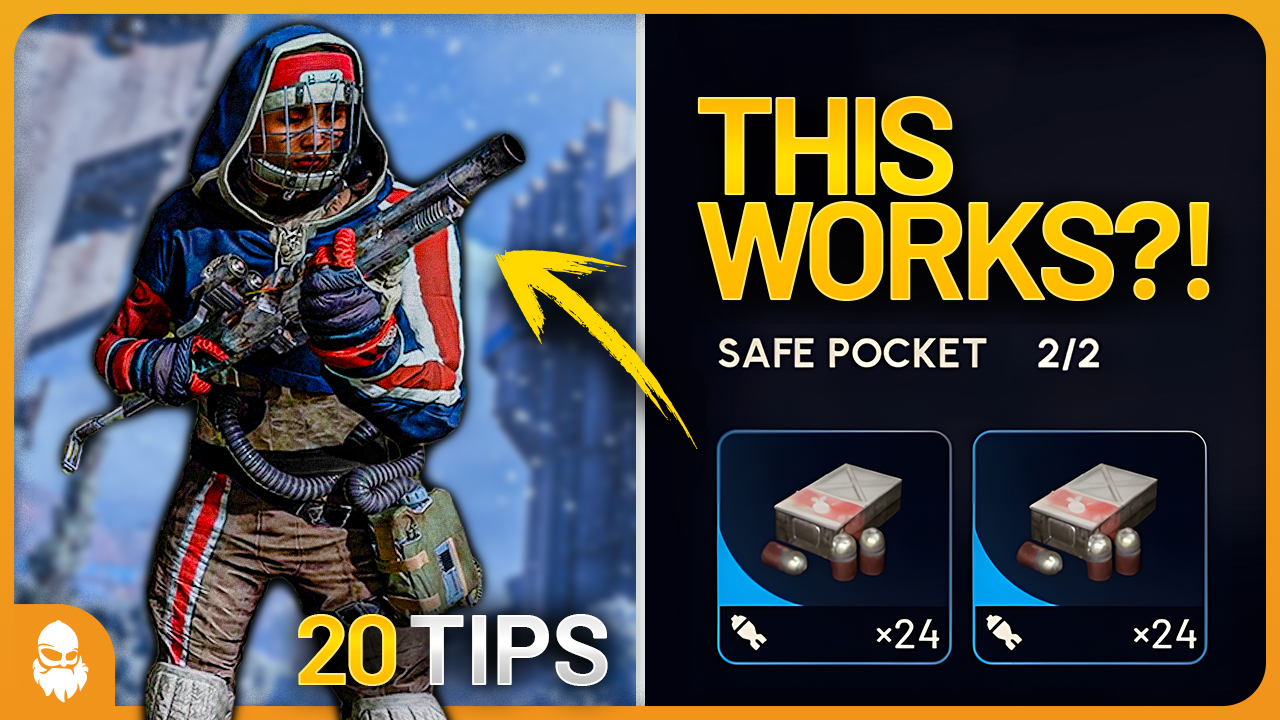
15. You can use ammo directly from your safe pocket
Ammo placed in your safe pocket is usable during a raid. A sort of makeshift belt feeding mechanic, I guess. For cheap ammo types it doesn’t matter much, but for expensive types like energy or launcher ammo, this can save you a lot of money. Most players will load into a raid with nothing in their safe slot. Instead, they could be cutting their losses by starting out with some ammo in that slot and replacing it with something more valuable later!
16. Hull Cracker value
You can buy one Hull Cracker per reset from the gun shop. This weapon can be purchased 30,000 coins, which might sound like a lot, but is actually great value! The Hull Cracker absolutely melts stronger ARC and makes your questing and trials far easier. Combining this with the previous tip of keeping your ammo in the safe pocket, you can drastically cut your losses if you die.
17. Free loadouts are OP
There is no limit to how often you can use free loadouts, and you have the same chance of spawning early as everyone else. On maps like Stella Montis, I’ve consistently walked out with 60–80k value per run on free loadouts — completely risk-free, which is fantastic for building some wealth if you’re running low. On top of that, free runs also let you stack up a ton of useful gear for later!
18. Check your surroundings during breaches
When breaching a door, you usually can’t see everything that’s going on around you. If you instead breach the door from one of the sides, you can suddenly rotate your camera fully and cover your six.
On a side note, you can cancel breaching boxes or ARC probes mid-way and resume where you left off if you want to quickly check the area first.
19. Snitch Scanners summon ARC when thrown
Snitches will call in support from other ARC if you spend too long taking it down, but did you know that the scanners they drop will do the same thing? Once looted, snitch scanners are consumables you can throw to call in ARC. It’s incredibly strong for pressuring players, forcing them out of cover, or disrupting fights.
20. You can extract while downed
A lot of people don’t know this, but you can call in an extract and activate the panels even after you’re down. This even works for raider hatches, allowing for a quick escape if there is one nearby! In this clip I was able to convince the player who downed me to let me open the hatch, as he also needed a quick exit. A mutually beneficial agreement, and a fun interaction overall!
OUTRO
And that’s it — 20 ARC Raiders tips I really wish I knew sooner. Did you learn anything new? Let me know in the comments!
Thank you for watching, and I’ll see you topside!